Peripherals part 4: Construction of the head fixation
For the observations the animal's head needs to be fixated above the center of the platform and therefore a head fixation method is required. This section is less detailed because you need to take your setup into account. Here we offer a solution which is basic and might work on your side. You can take this as an idea for the general basic structure if you design it yourself. In generell, we can recommend Thorlabs for ordering equipment.
Parts
- 1 aluminium rod 12mm diameter
- 2 aluminium strut profile
- 1 center air table
- 2 connecting clamp
- 2 M5 rods
Tools
Head fixation requirements
- Keep the head in one position centered above the table.
- The mouse needs to touch the ground in order to move the platform.
Step 1: Placing vertical mounting
-
Place one free nut in each 480 mm aluminium strut profile of the center air table, pointing upwards.
- The nut was placed in the step "Construction of the rewards system"
-
Move the nuts to the center of the two 480 mm aluminium strut profiles.
-
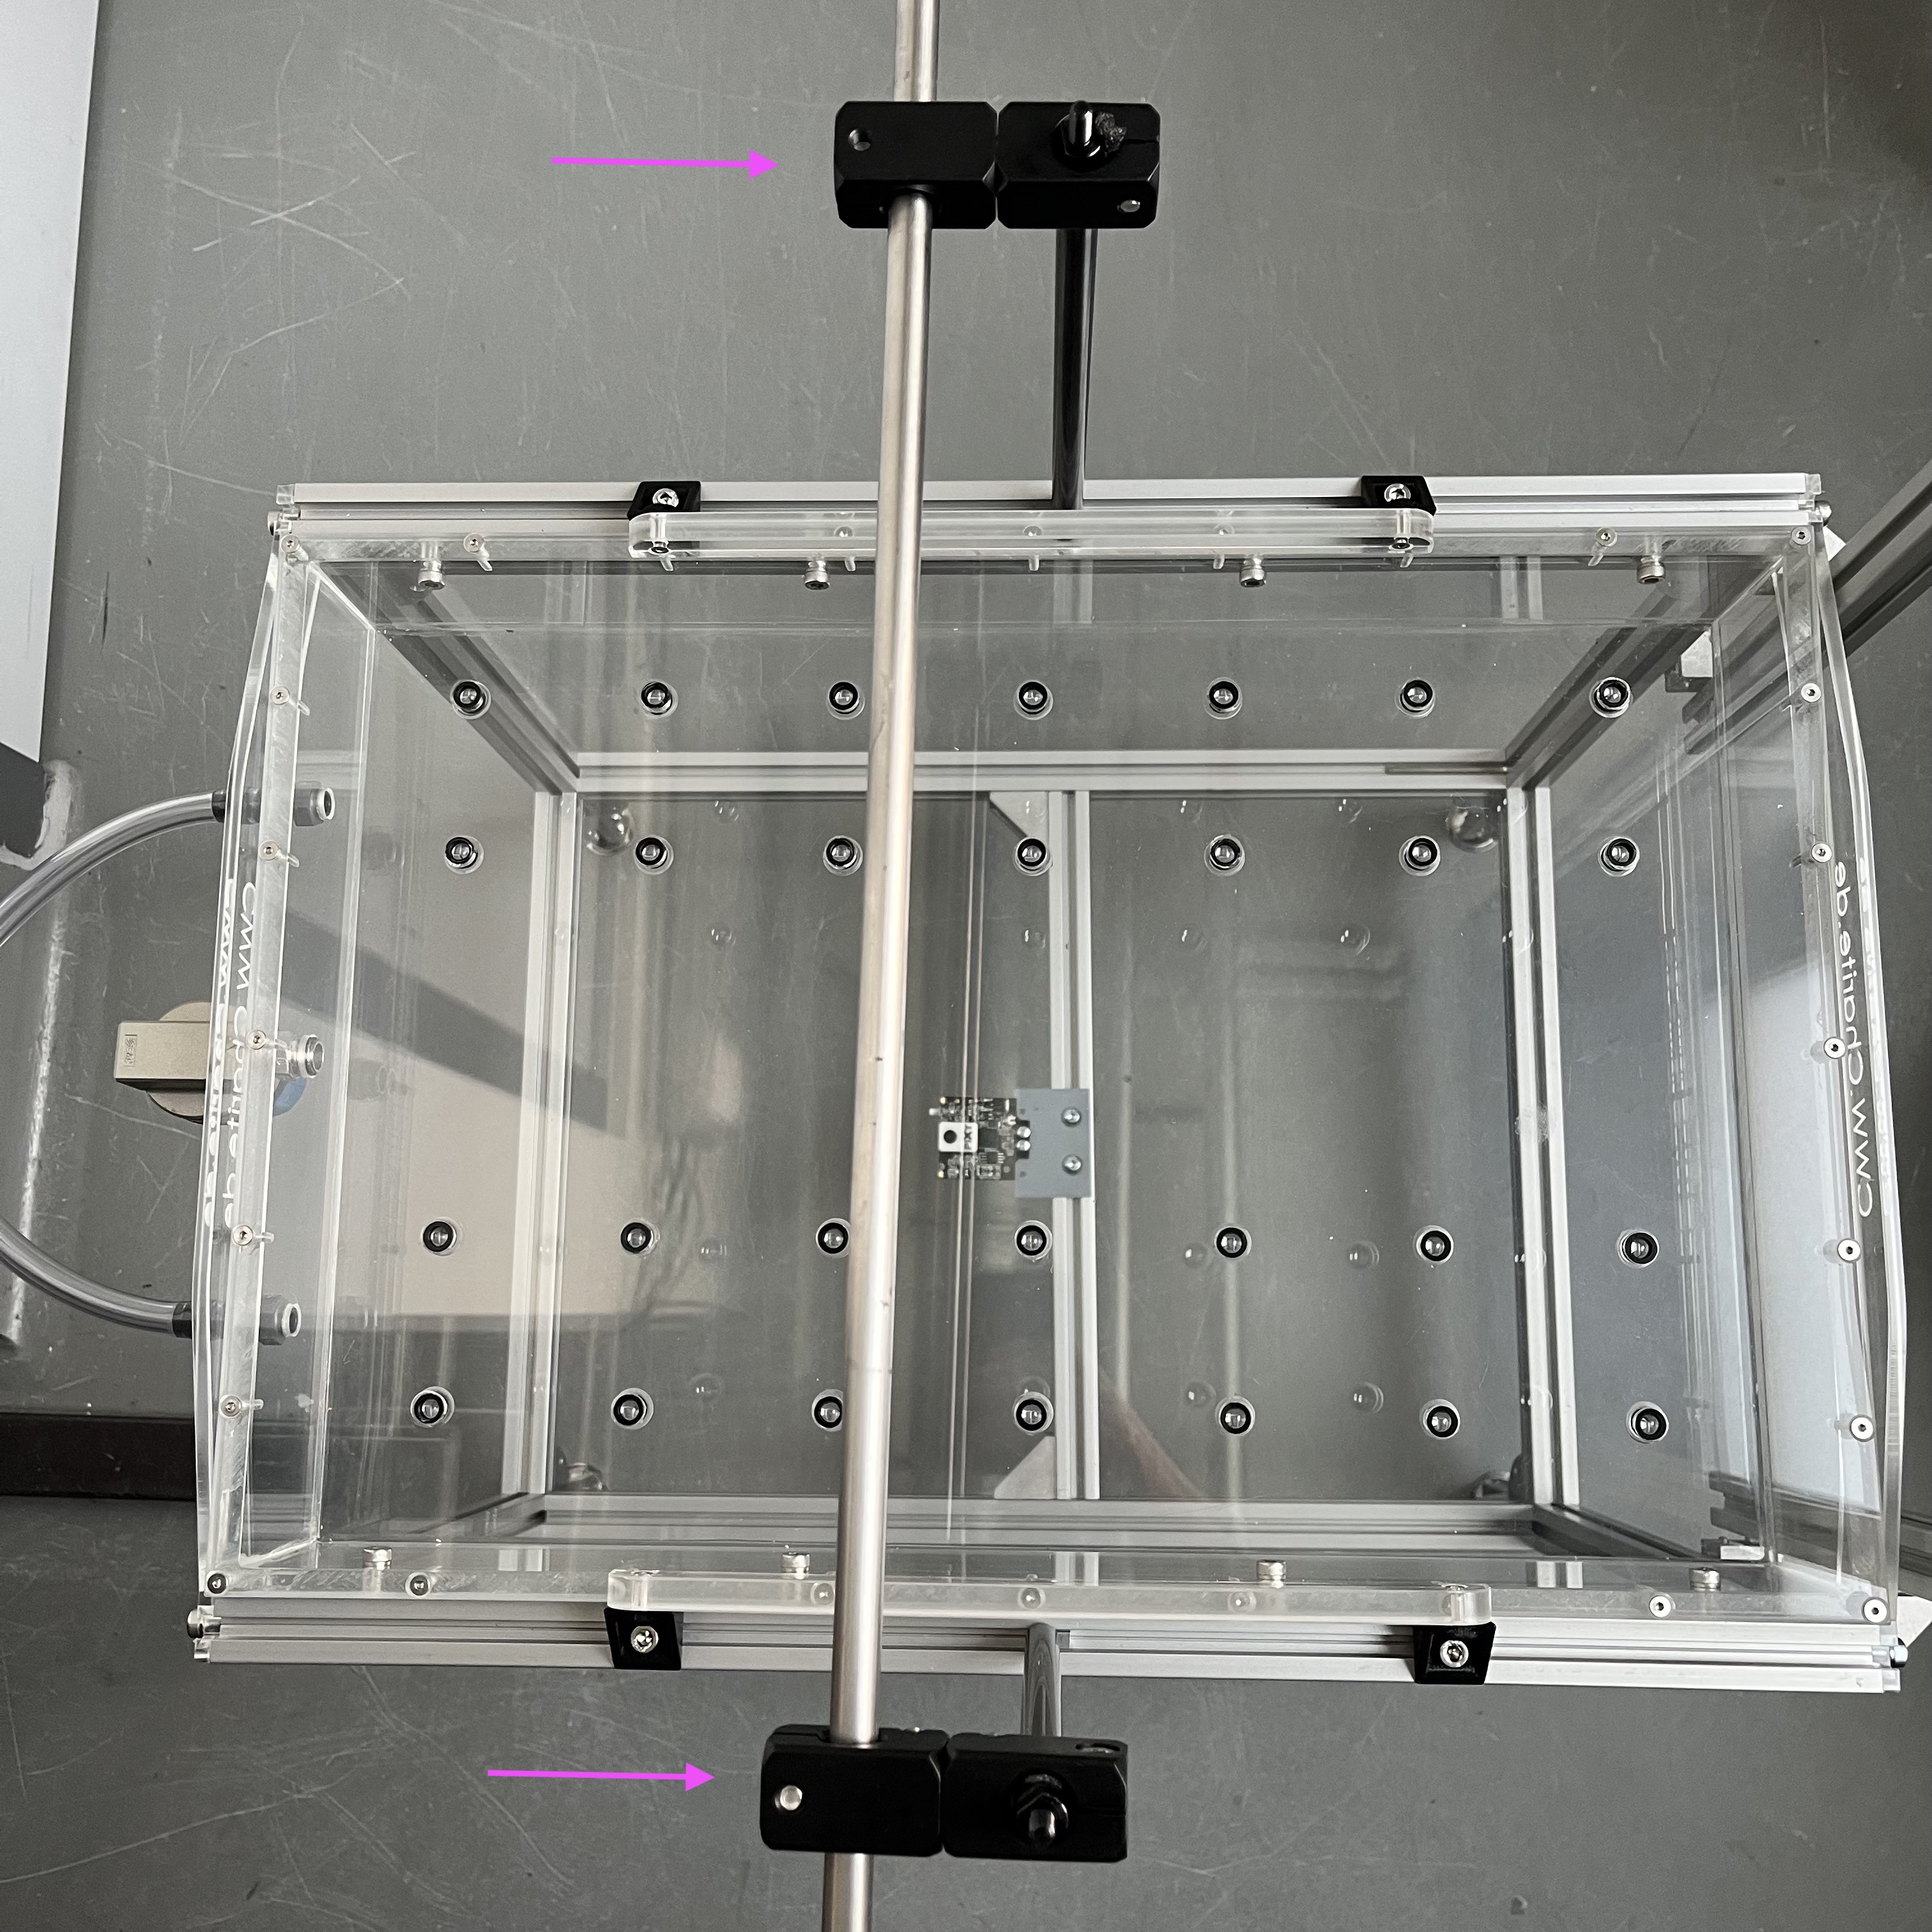
Place in each central nut one of the M5 rods. Attach on each M5 rod a connecting clamp 150 mm above the table.
Step 2: Attaching the head fixation
-
Turn both connecting clamps on the upwards pointing rods in a 90 degree angle.
-
Cut a 380 mm long piece of an aluminium rod 12mm diameter with a metall saw, and place it in both connecting clamps on the upwards pointing rods. On this rod attach the headfixation.
If the head fixation system you have is incompatible with this construction, a placement on the vertical M5 thread rod might work.
Picture of the rod above the table for the headfixation
