airtrack-v2-documentation
Peripherals part 3: Construction of the rewarding system
We will fix here a linear actuator that will bring the reward to the animal. The reward itself is delivered with two solenoid valves.
A buzzer is added to the system but do not need to be fixed to the table.
Additional framework {pagestep}
The following elements will be placed on the air table struts opposite of the pressure relief valve.
-
Place two outside pointing (air table center as perspective) nut{Qty:2}s in one of the vertical aluminium strut profile of the center air table{qty:1}. Place one around the height of the lower framework and one close to the top of the aluminium strut profile.
- Attach to both nuts an angle{Qty:2} by using M5 screw (12mm){Qty:2}. The angles must point outwards.
- Between the strut and the angle a M5 hexagon nut{Qty:4}s is needed because of the shape of the angle.
- Alternatively you could use a three millimeter spacer for M5 screws or get extra angles with a flat outside.
- Between the strut and the angle a M5 hexagon nut{Qty:4}s is needed because of the shape of the angle.
- Attach vertically an aluminium strut profile which raises 250 mm above the airtable by using M5 screw (6mm){Qty:4} and nut{Qty:4}s at the attached strut profile.
- Between the strut and the angle a M5 hexagon nut{Qty:4}s is needed because of the shape of the angle.
-
The exact length is depending on your choices of the general height.
-
Now place one nut{Qty:2} in each just attached, vertical aluminium strut profile. The nuts in each aluminium strut profile needs to point to each other.
- Attach to these nuts an angle{Qty:2} by using M5 screw (6mm){Qty:2}. The unattached side needs to point towards the air table.
-
Take one aluminium strut profiles (length: 326mm){Qty:1} and place it horizontal at the vertical aluminium strut profiles pointing to the air table.
-
Use two nut{Qty:2}s and two M5 screw (6mm){Qty:2} to fixate the aluminium strut profiles.
- The lower edge should be at the height of the air table surface. This works as one platform border.
Image for tasks of step 1
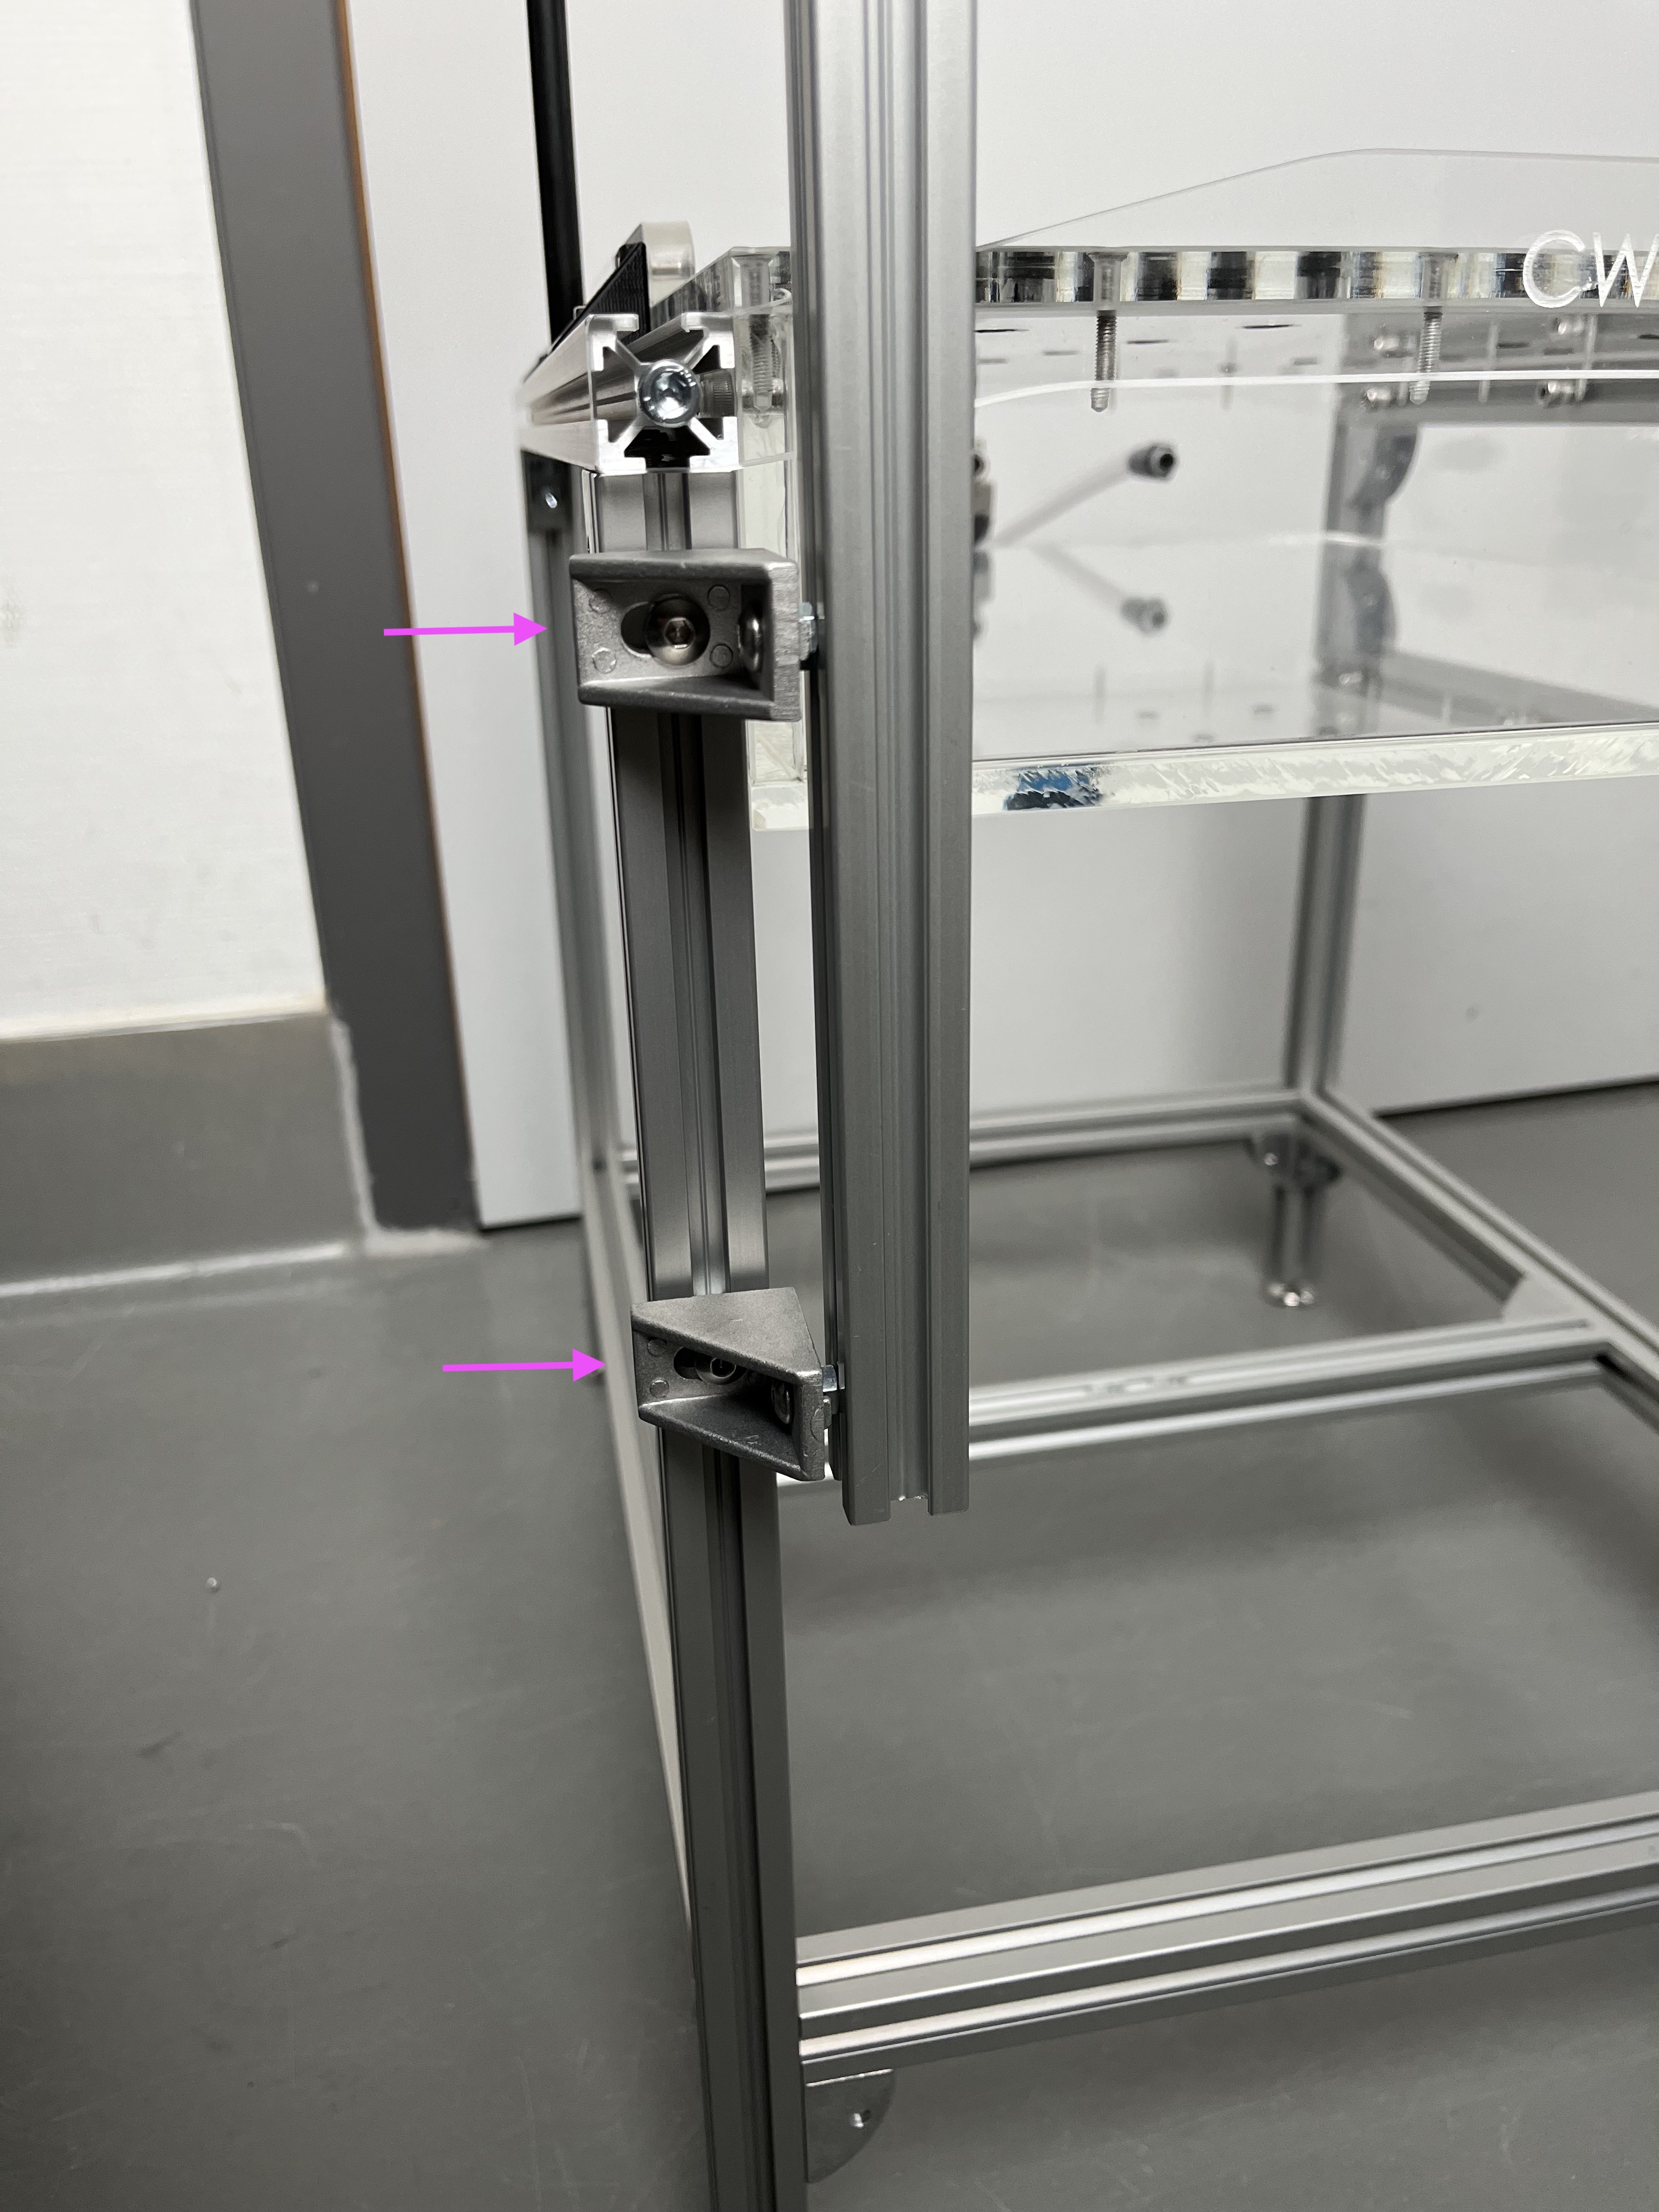
Platform borders {pagestep}
- Place four nut{Qty:8}s in each upper aluminium strut profiles of the U-formation frame.
- Insert them from the pressure reliefe side.
- Use the deepest and third deepest nuts and place them with a distance of 150 mm from the center in both directions. Attach an angle{Qty:4} to each by using M5 screw (6mm){Qty:4}. Just leave the nut in between for later (head fixation).
- Between the strut and the angle a M5 hexagon nut{Qty:4}s is needed because of the shape of the angle.
-
The angles should point towards the air table.
- Fixate the 350mm x 30mm plexiglass plate{Qty: 1} with two M5 screw (12mm){Qty:4} and two M5 hexagon nut{Qty:4}s at the angles on both sides.
-
Therefore mark and predrill the spots of the angle holes at the plexiglass for the screws with a 5mm drill in advantage.
-
Place the at last inserted nuts at both ends (side with pressure relieve valve) of the aluminium strut profiles of the U-formation frame.
-
Attach two angle{Qty:2}s to the nuts by using M5 screw (6mm){Qty:2}.
-
The angles should point to the outside.
-
Mark the angle holes at the 366mm x 30mm plexiglass plate{Qty: 1} and predrill them with a 5mm drill.
- Attach the 366mm x 30mm plexiglass plate by using two M5 screw (12mm){Qty:2} and two M5 hexagon nut{Qty:2}s.
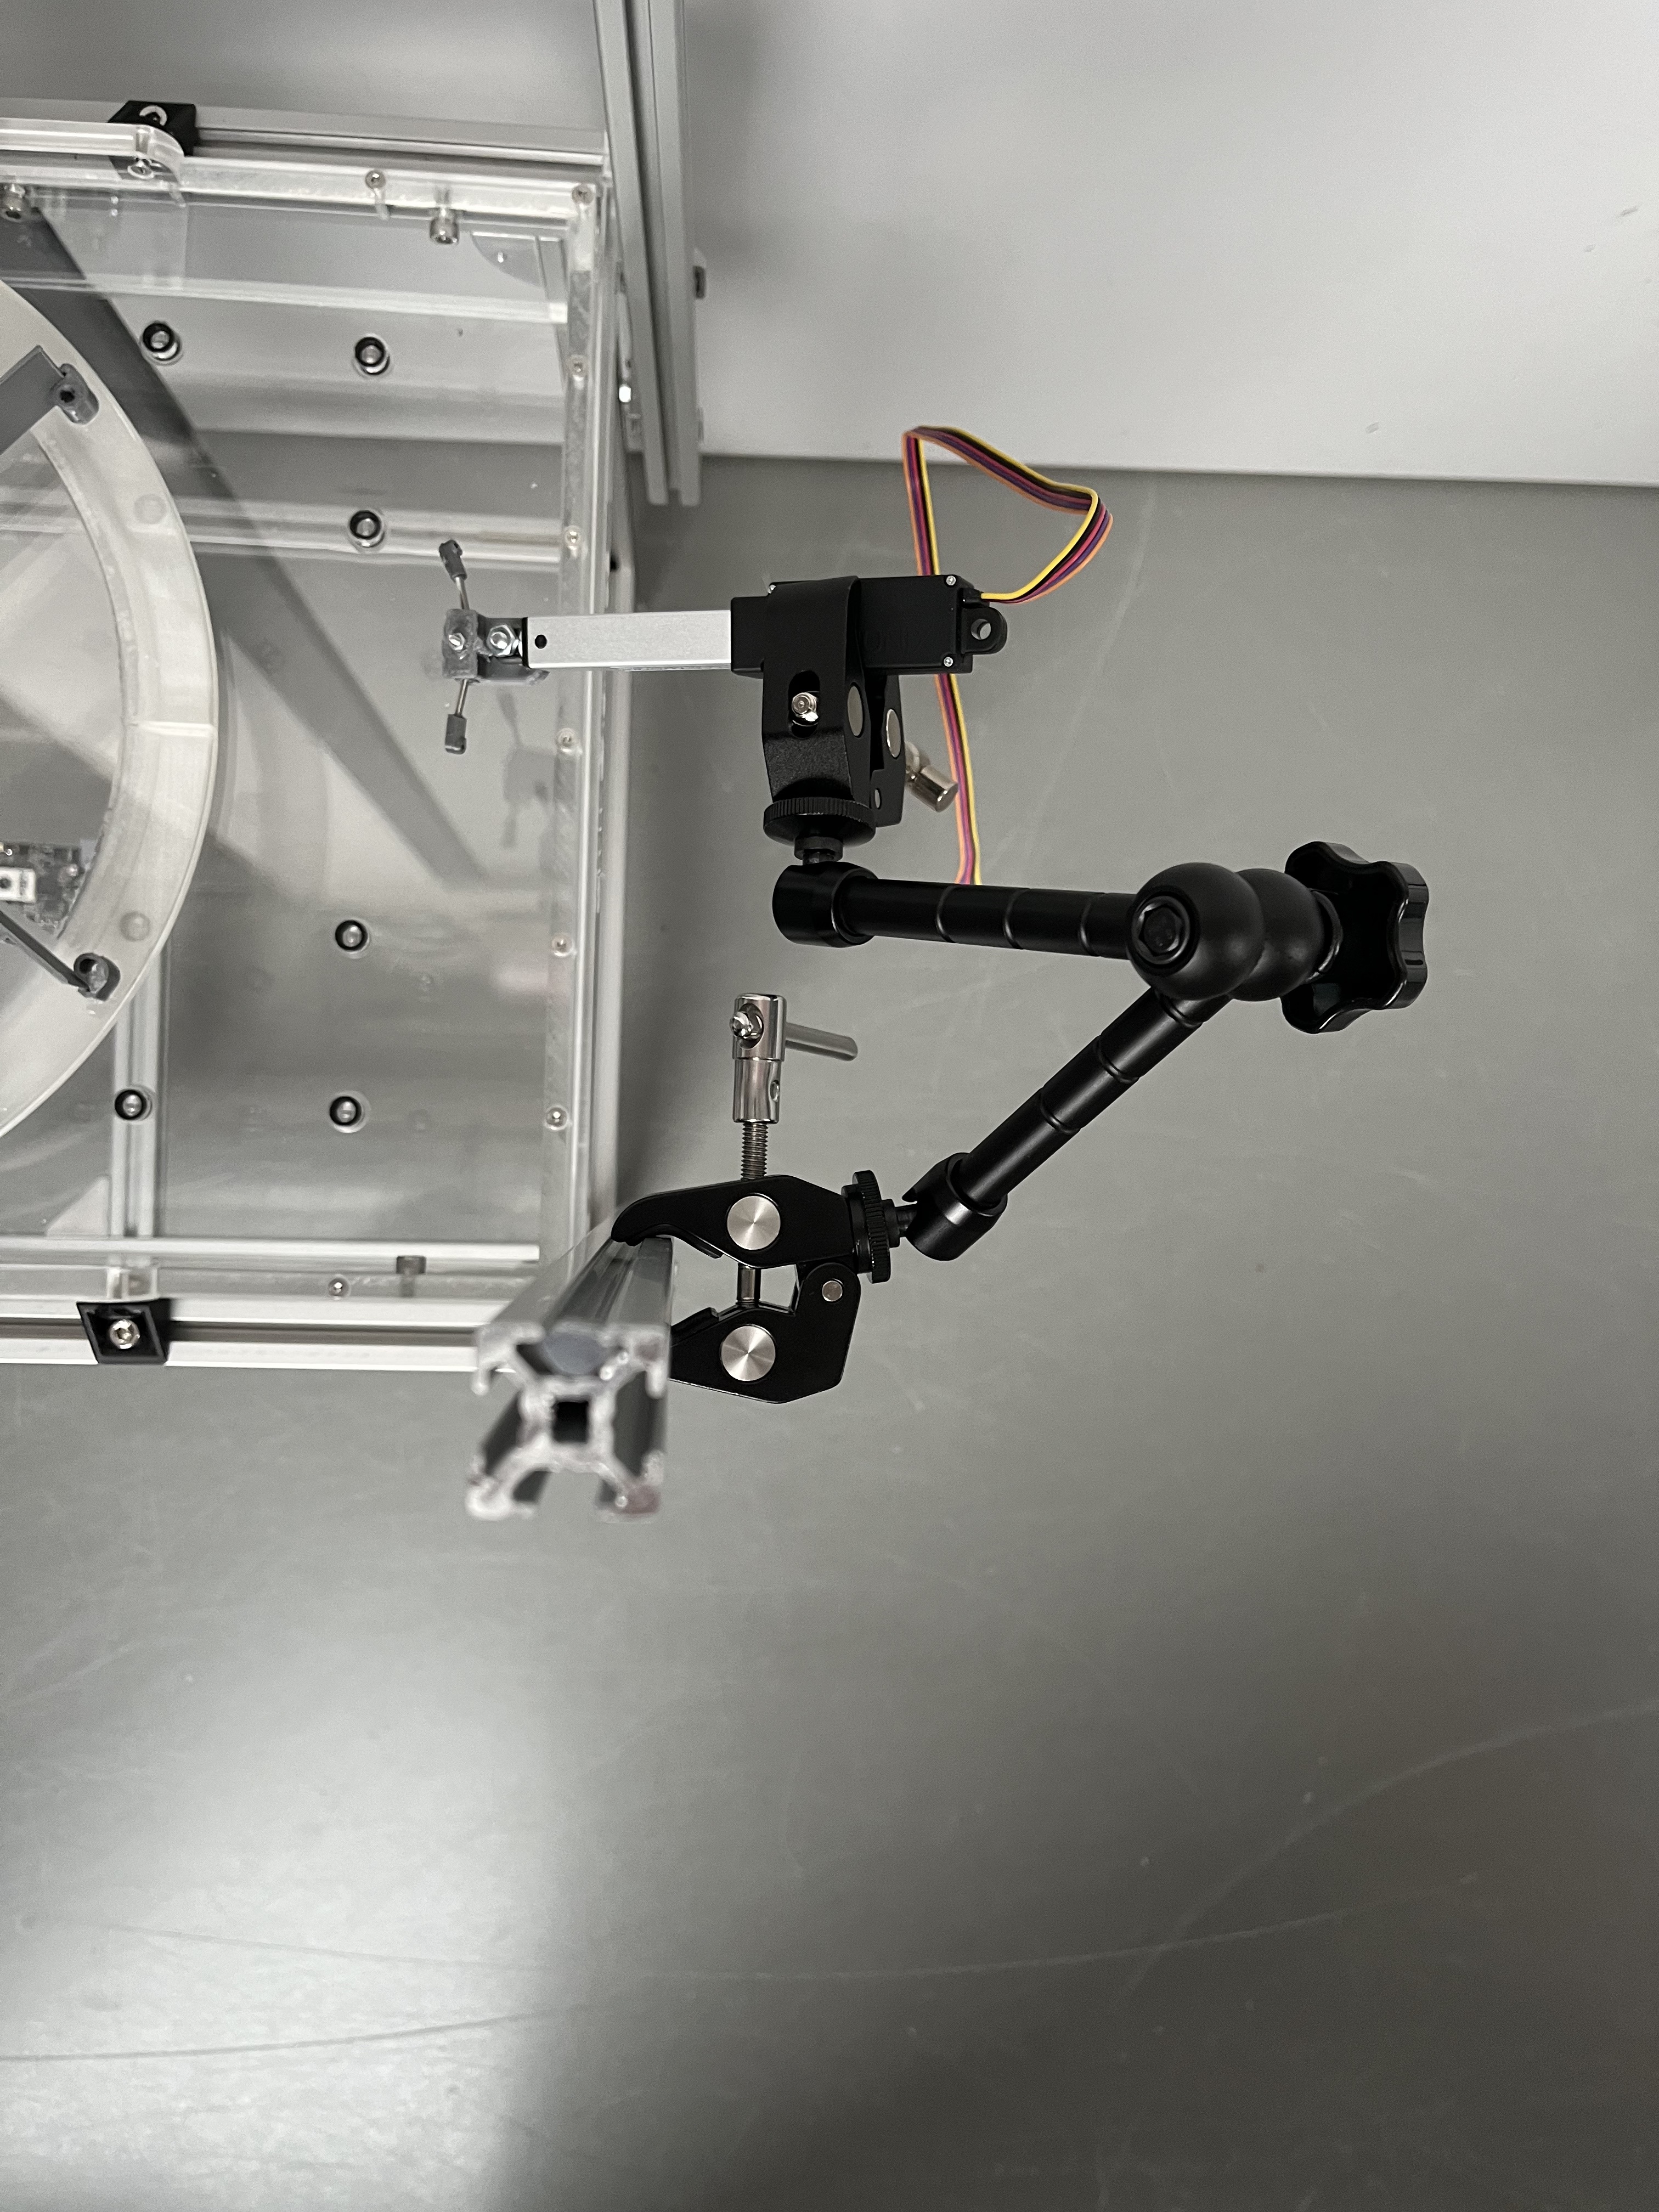
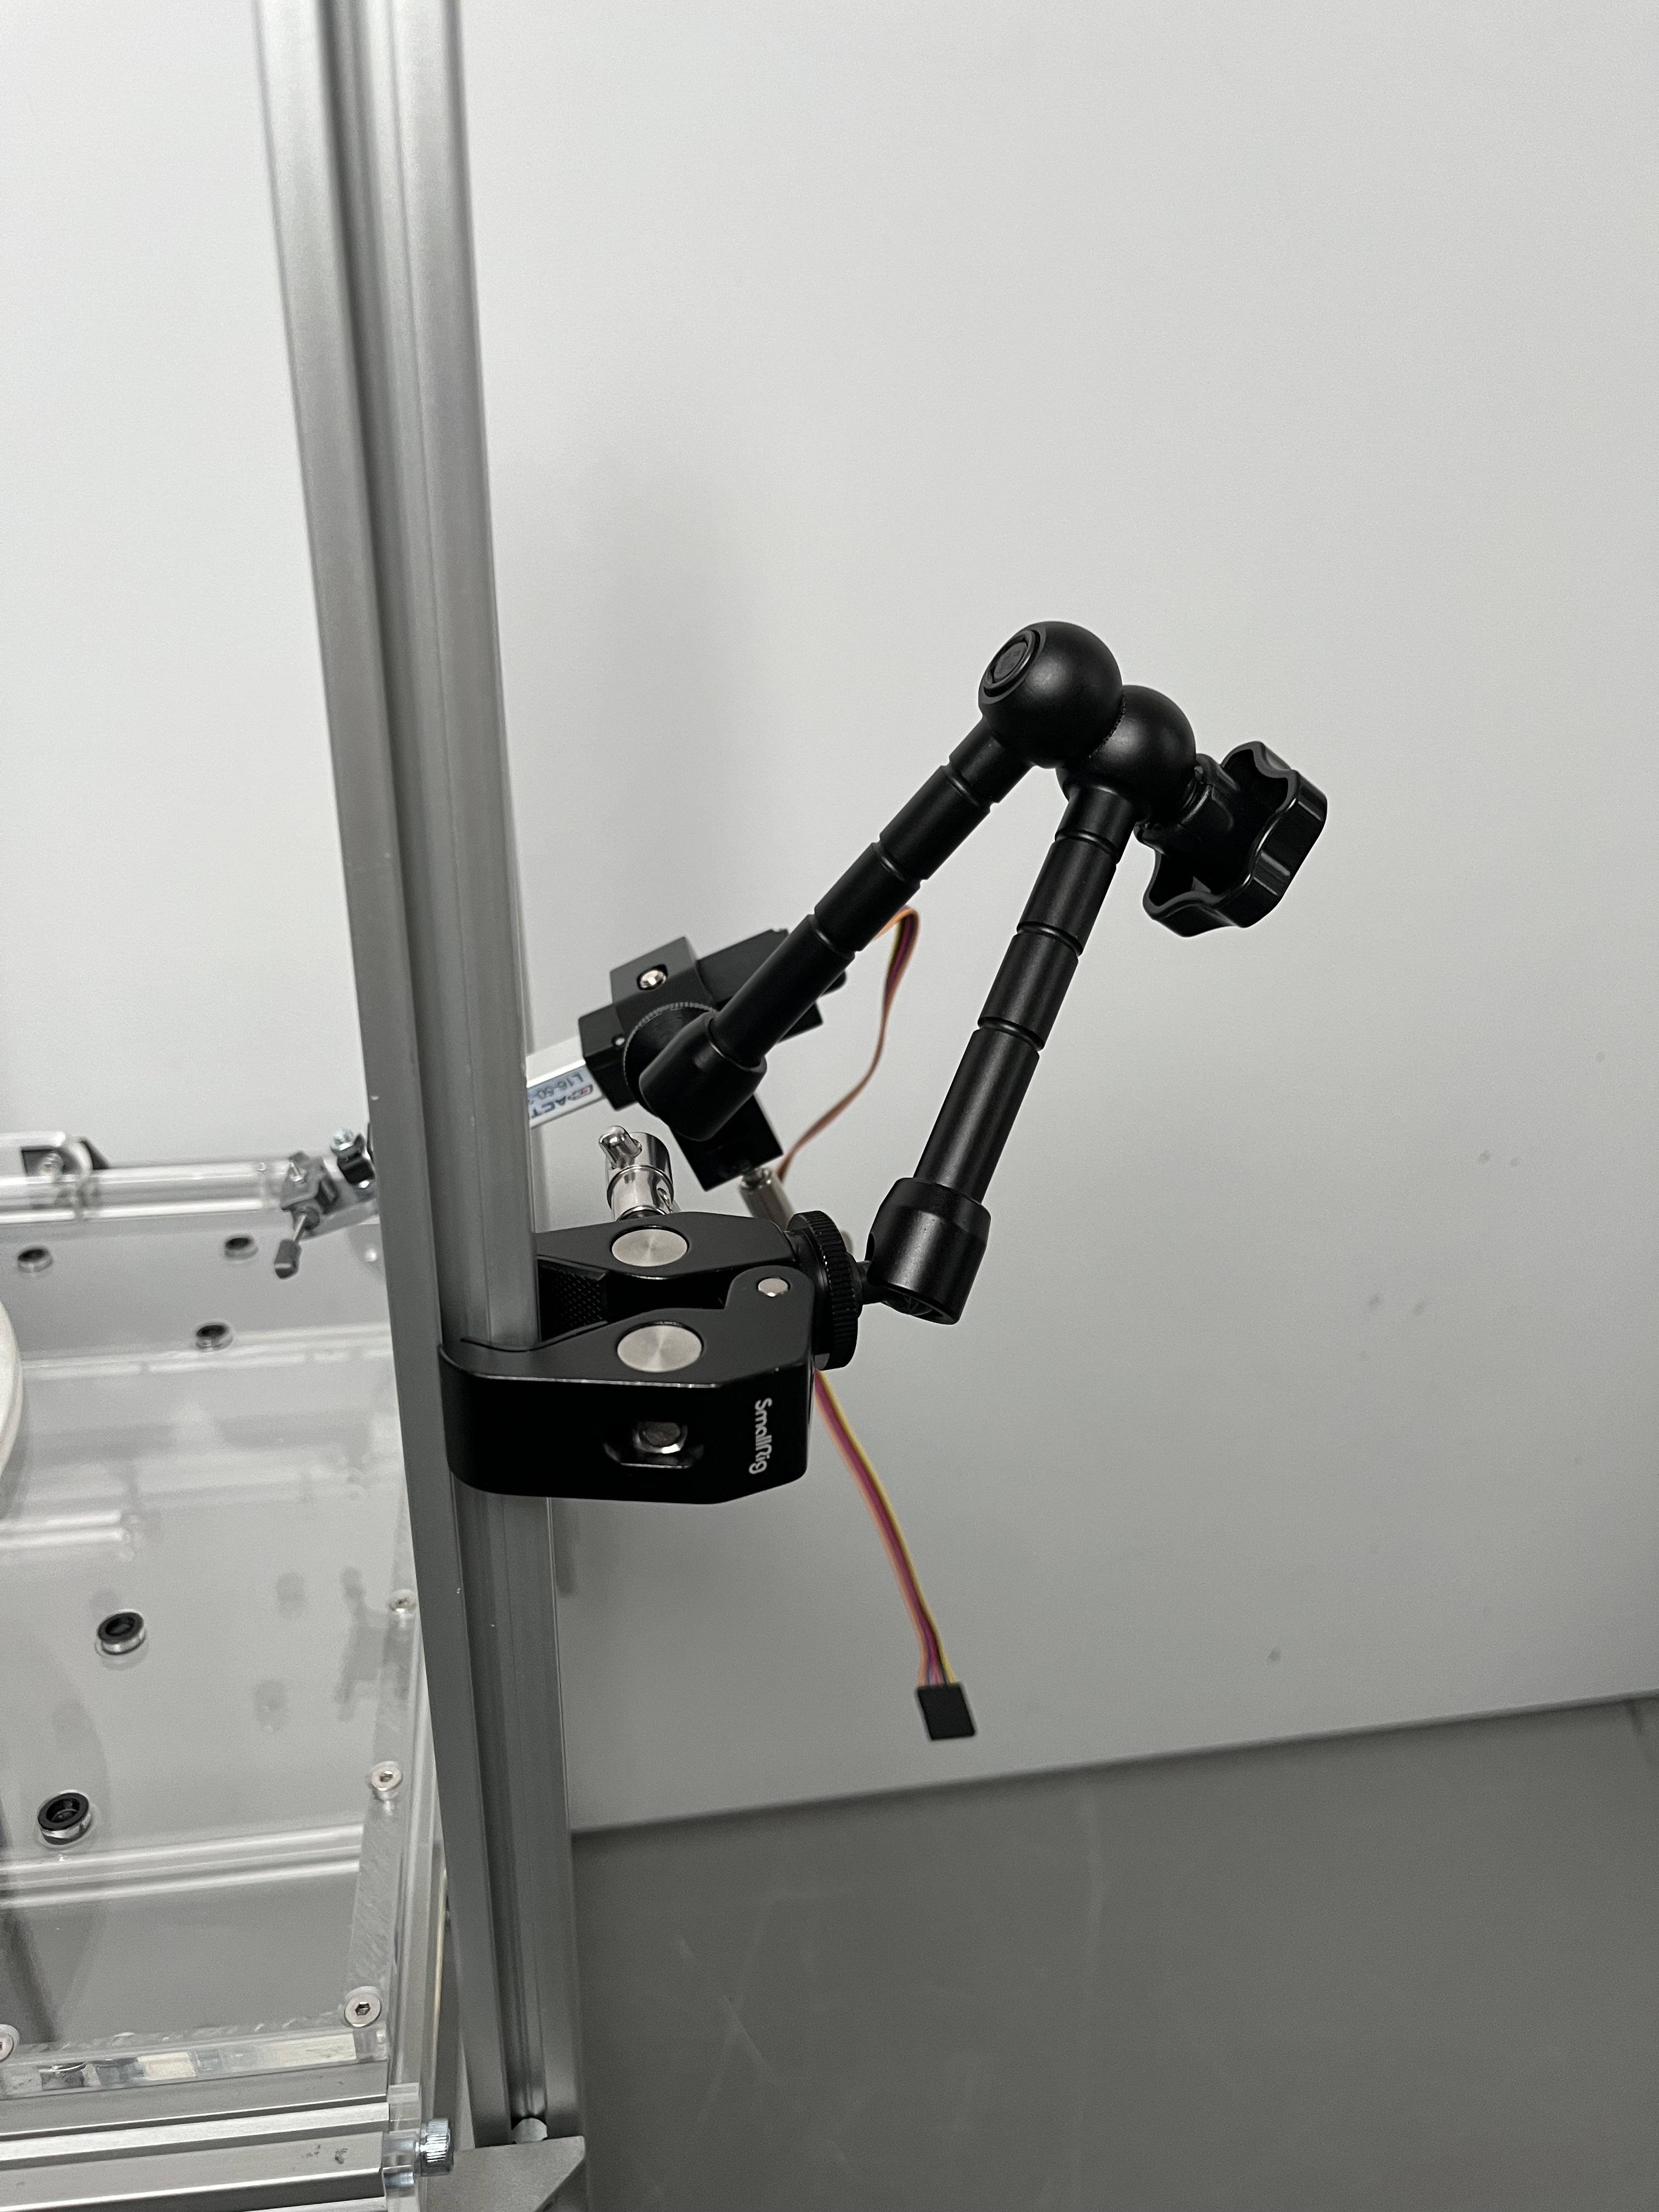
Fixing the linear actuator {pagestep}
-
Place two SmallRig super clamp{Qty:2} at both ends of the SmallRig articulated_arm{Qty:1}.
-
Use one SmallRig super clamp to place the moving arm at one of the vertical strut profiles above the table, which side is up to you.
-
Place the linear actuator{Qty:1} in the SmallRig Super Clamp close to the center end of the not moving part.
- In the case you didn’t attach the 3D prints at the front of the linear actuator, the front hole in the linear actuator needs to point upwards.
-
Move the articulated arm and linear actuator to have the linear actuator orientated along the long side and centered. The moveable end needs to point towards the pressure relief valve. The super clamp should be around 10 cm above the table and 5 cm from the short airtable edge. The linear actuator should point around 30° downwards.
Pictures of the linear actuator placed with the SmallRig moveable arm
Fixing the solenoid pinch valve {pagestep}
Place one solenoid pinch valve{Qty:2} at the top of the vertical aluminium strut profile.
-
Therefore place two nuts (M4){Qty:2} at the top of the aluminium strut profile and fixate a pinch valve clamp{Qty:2} on each with a M4 screw (6mm){Qty:2}.
-
Place the solenoid pinch valve inside the pinch valve clamp.
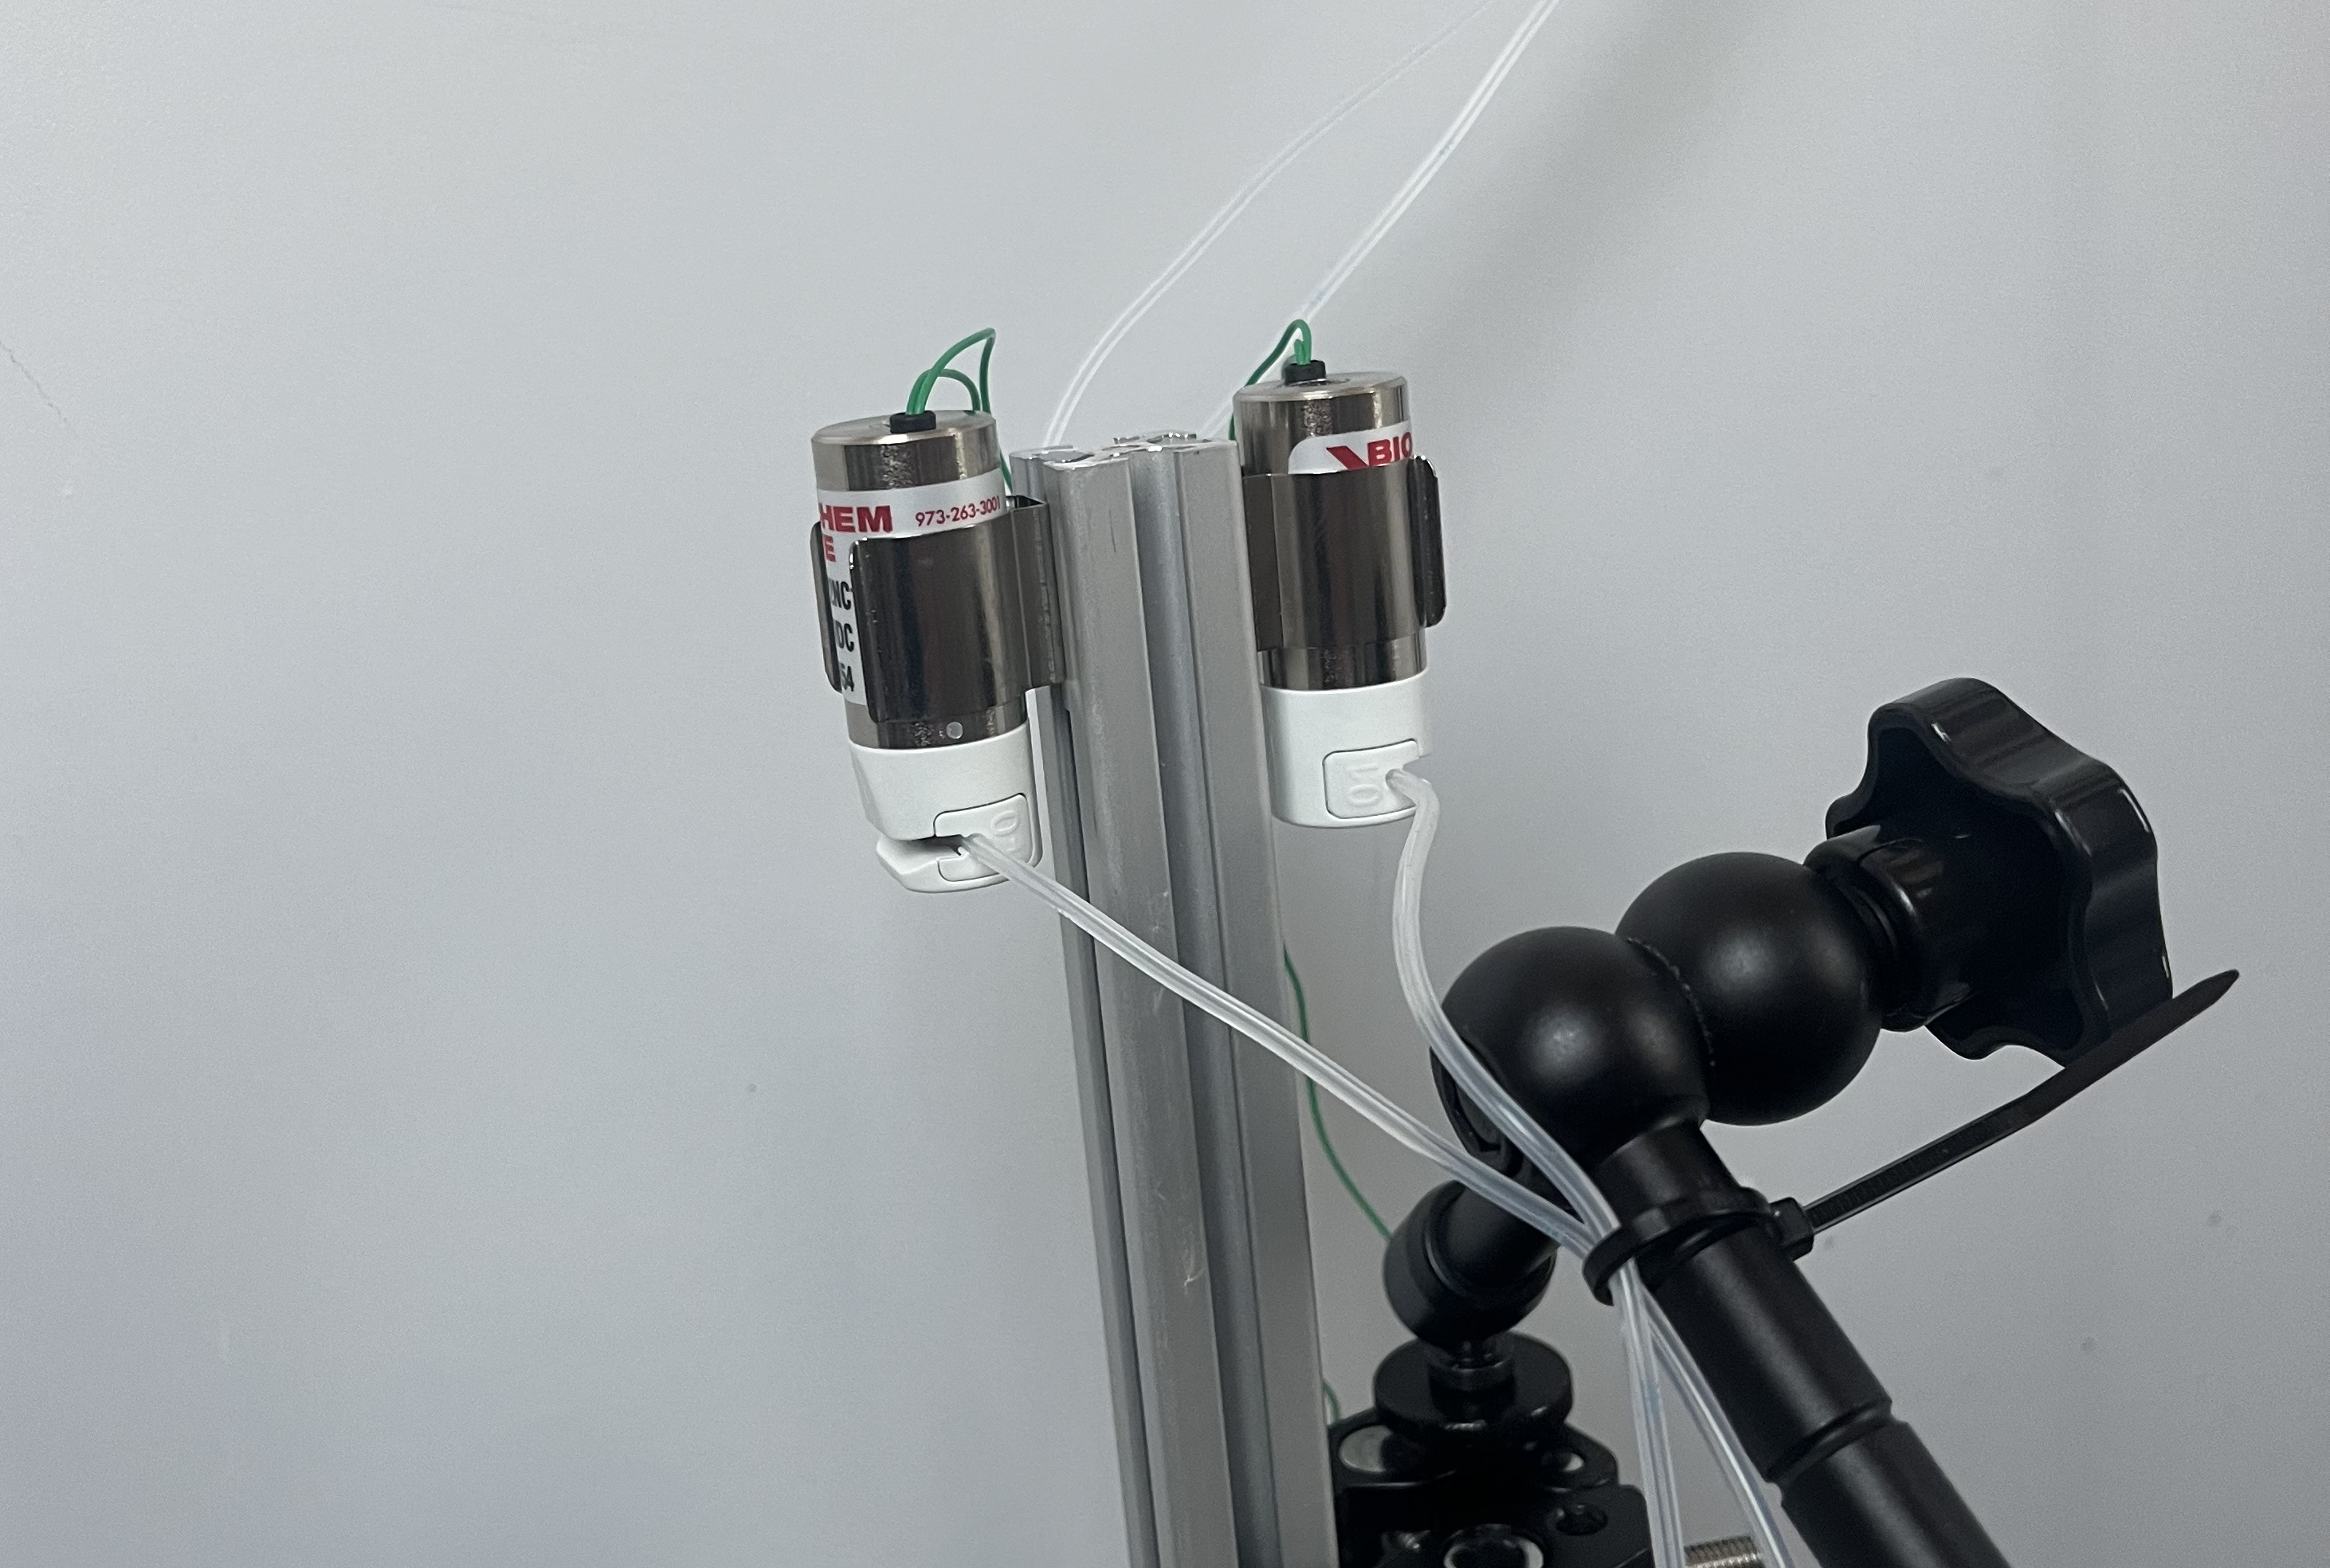
Tube placement {pagestep}
Finally you need to path the tubing from you source of reward through the solenoid pinch valve to the needle at the linear actuator front.
-
Use some cable ties{Qty:many} to guide the tube{Qty:1} to the needle.
- Keep enough margin for maneuver for the tube as the linear actuator is moving.
- Don’t pull the cable ties tight as liquid needs to flow through.